I am going to create a virtual machine in VMware workstation and then Install Kali Linux in the new VM. Following video demonstrates the process too.
Download Installer Image
Download Kali Linux installer image (64-bit) iso file and save it to your local drive (Do not store the iso image online such one drive or google drive). Please not the location where you save the installer image.
Create a Virtual Machine
To Create a Virtual Machine, start VMware Workstation Pro and select New Virtual machine from it’s menu. Then, select Custom, as shown below, and go Next.

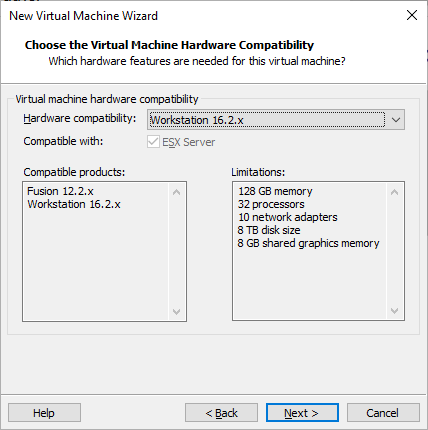
Select Workstation 16.x for hardware compatibility, as shown below, and go Next.
Select I will install the operating system later, as shown below, and go Next.

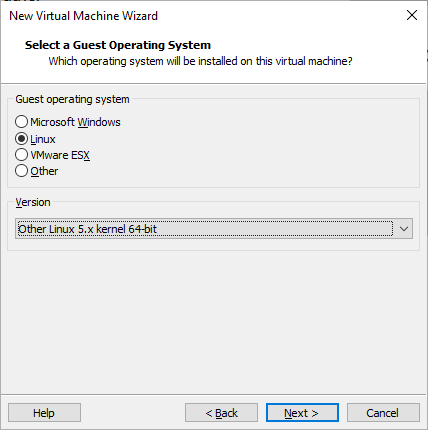
Select Linux for Guest operating system and Other Linux 5.x krnet64-bit for version and, as shown below, and go Next.
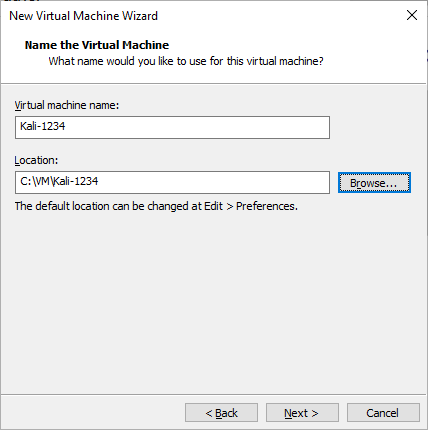
Then, type in a name for the VM and create/select a new folder for the location, as shown below, and go Next.
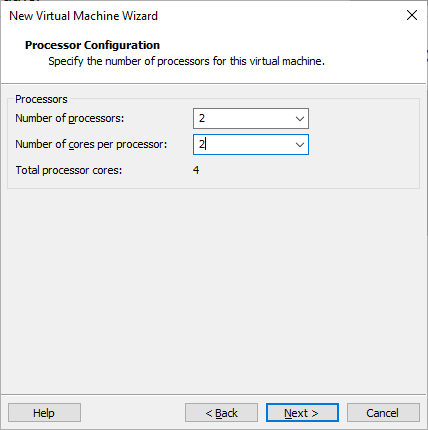
Then, select 4 processors, as shown below, and go Next.
Then, select NAT for network connection, as shown below, and go Next.

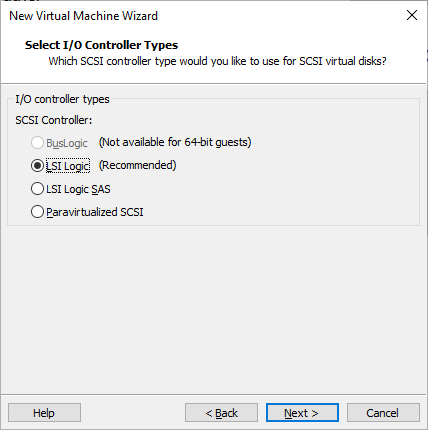
Then, select the recommended LSI Logic, as shown below, and go Next.
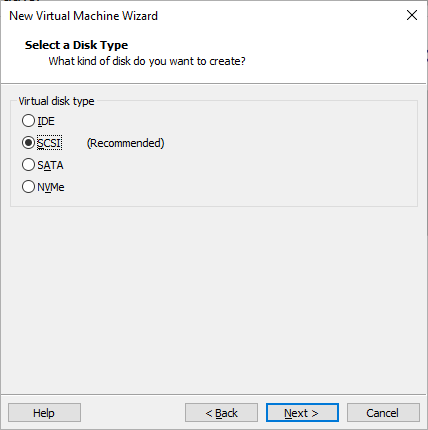
Then, select the recommended virtual disk type, as shown below, and go Next.
Then, select Create a new virtual disk, as shown below, and go Next.

Then, select store virtual disk as a single file, as shown below, and go Next.

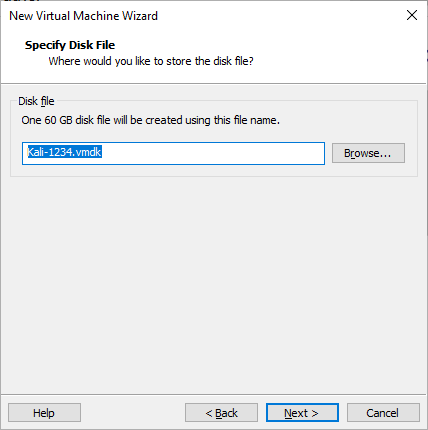
Then, keep the disk file name as recommended (or change it, if you wish), as shown below, and go Next.
Then, check the summary of the VM, as shown below, and click on Finish.

The virtual machine will look like something as shown below.

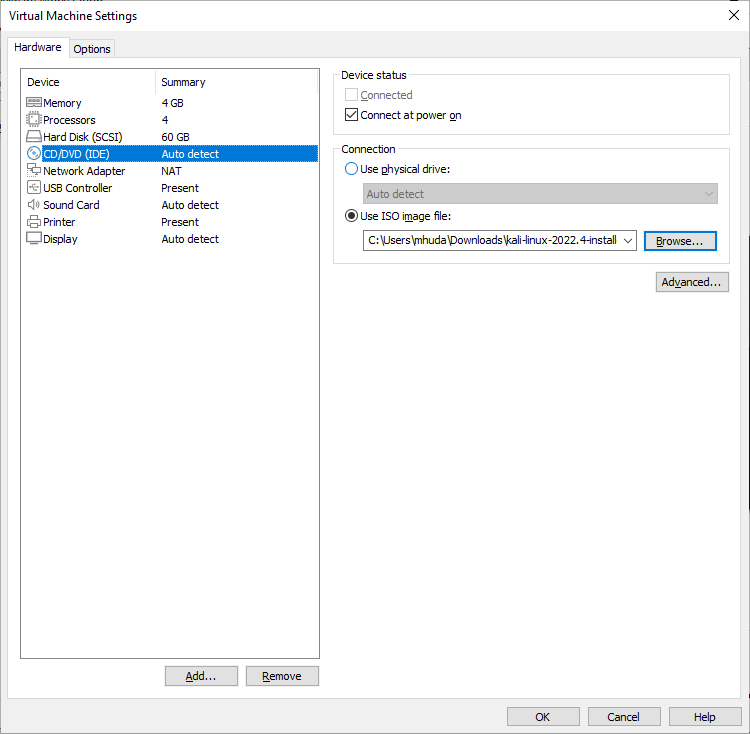
Then mount the downloaded Kali Linux installer iso image from you local storage to the CD/DVD drive and press OK.
Power on the Machine, it should start the installation process.
Install Kali Linux
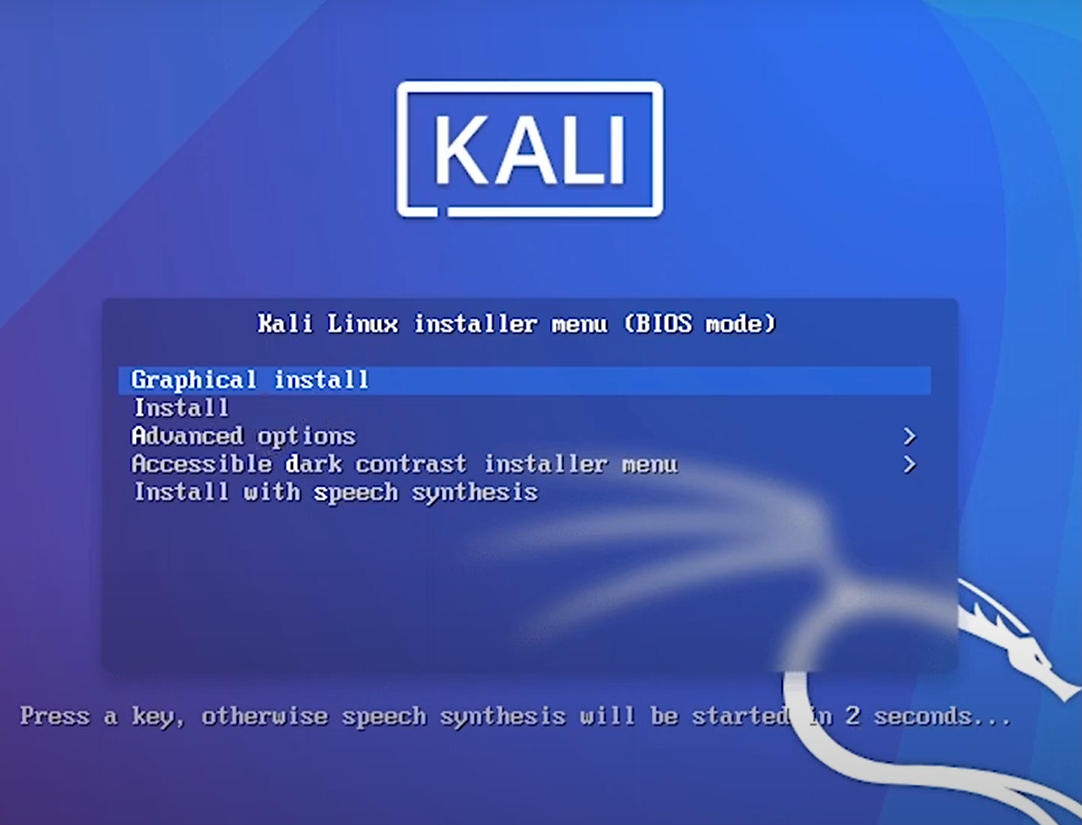
When you power on the virtual machine (with installer iso image mounted), Kali Linux installation wizard starts. Select Graphical Install from the installation options.
Select language, location and keyboard in the next three steps.
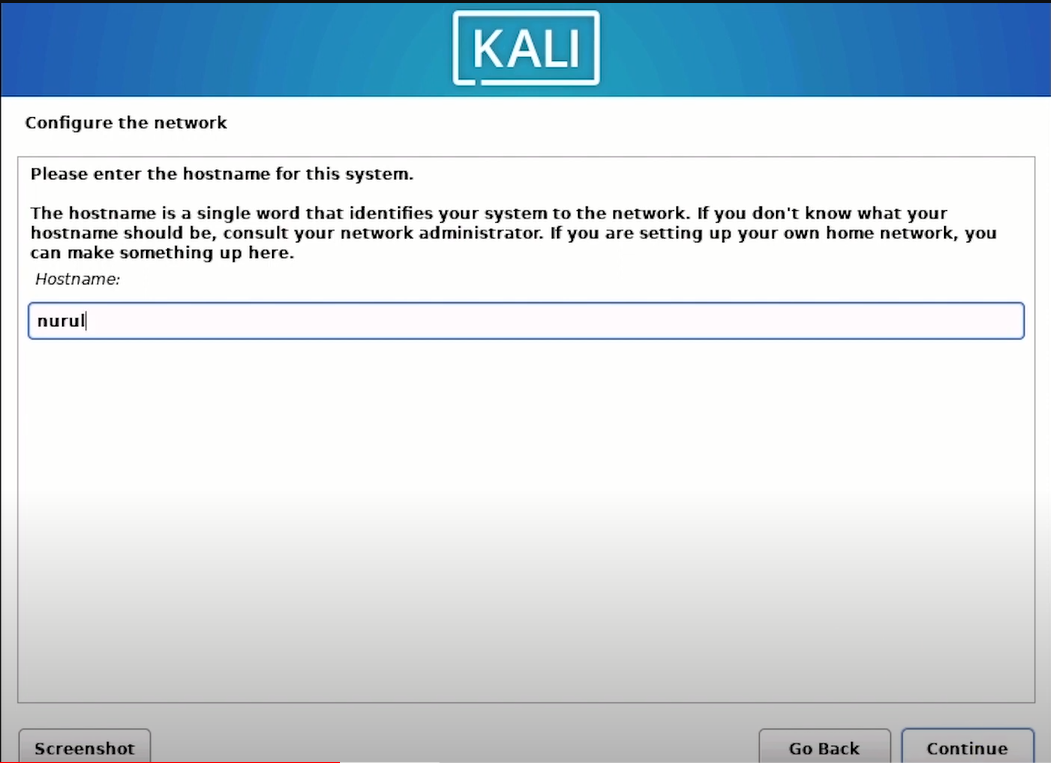
Type in hostname (computer name) and leave the domain name empty in next 2 steps.
In the next two steps, set a username and password for the OS.


Next, configure the clock.
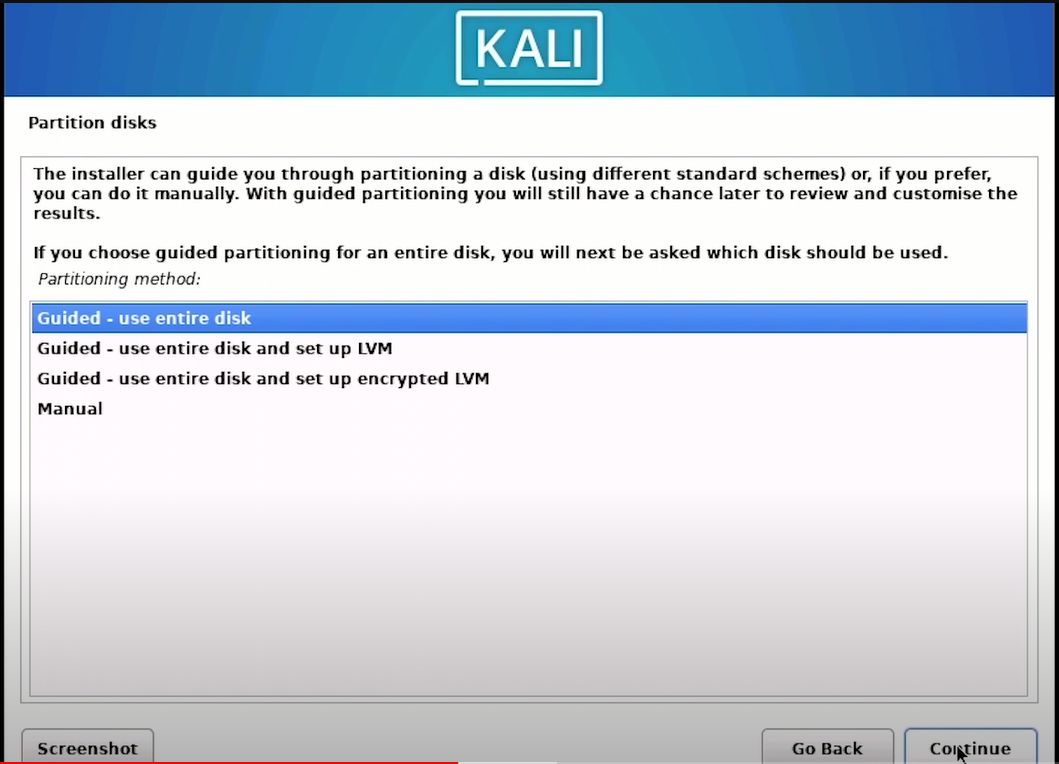
For partition disk, use “Guided – user entire disk” and “All files in one partition”.

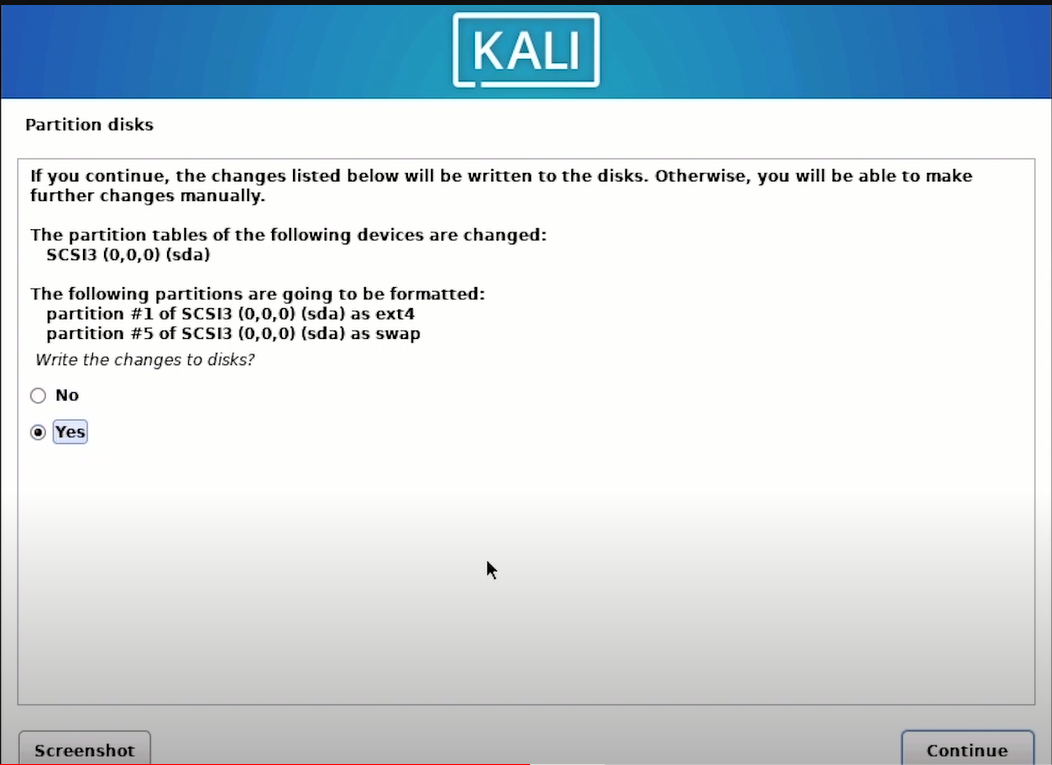
Leave the default in next step and select “Yes” for Write the changes to disk option.
Installation progresses.
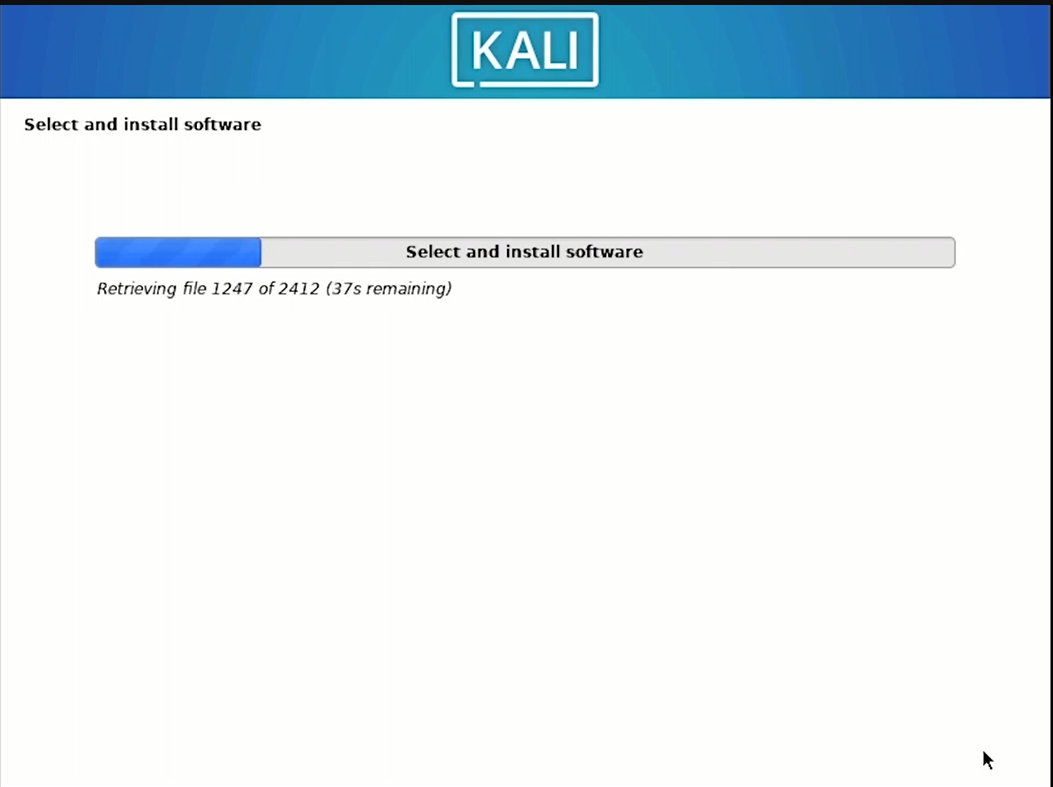
Select the software.

Installation progresses.
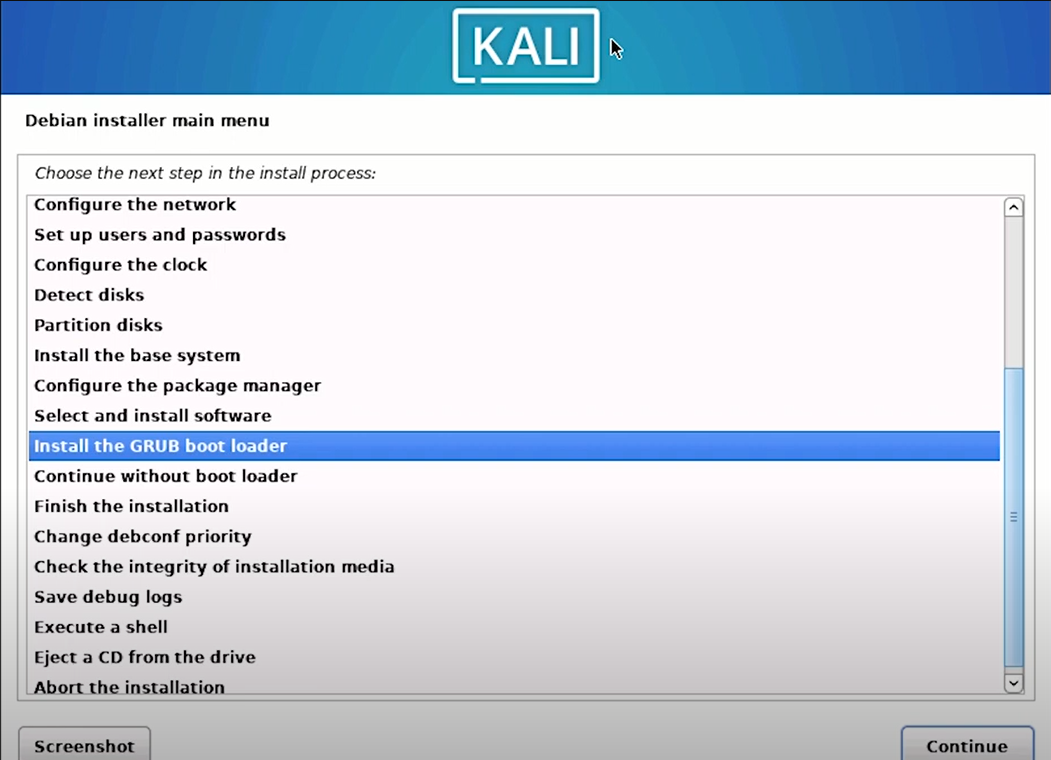
Select “Install the GRUB boot loader”
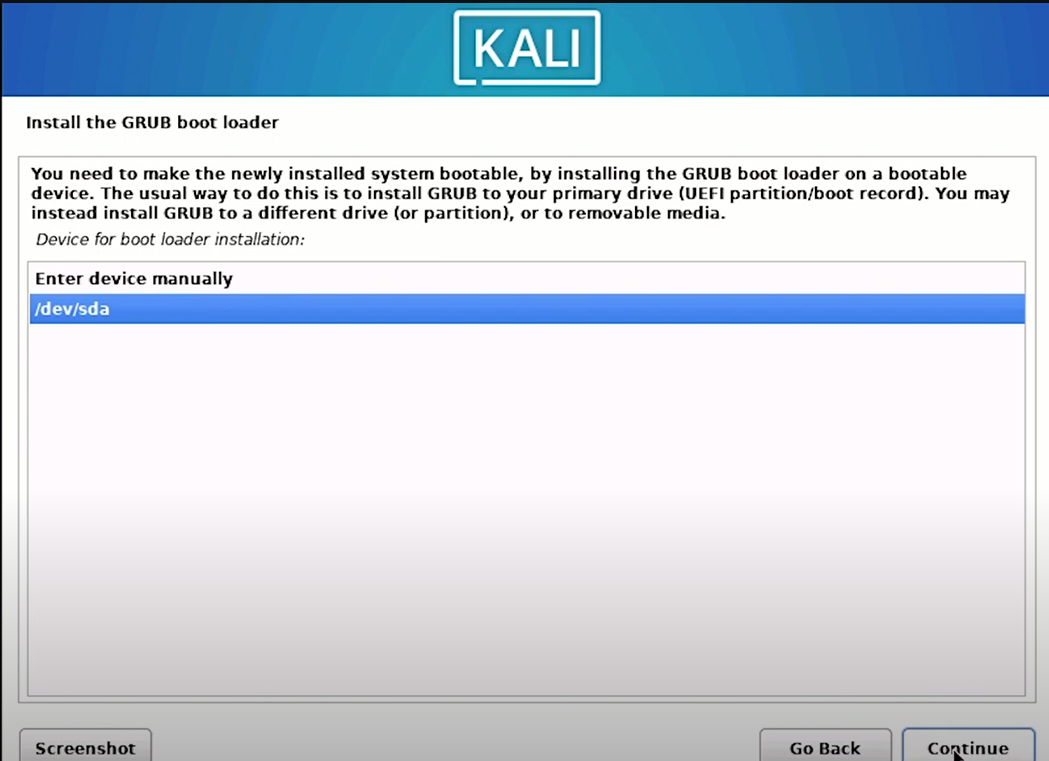
Leave the default in the next step and select “/dev/sda” for device for GRUB boot loader.
The system will reboot when the installation is complete.

At the login prompt, login with your username and password that you created earlier.

Open the terminal and update and upgrade the system by using “sudo apt update” and “sudo apt upgrade” commands
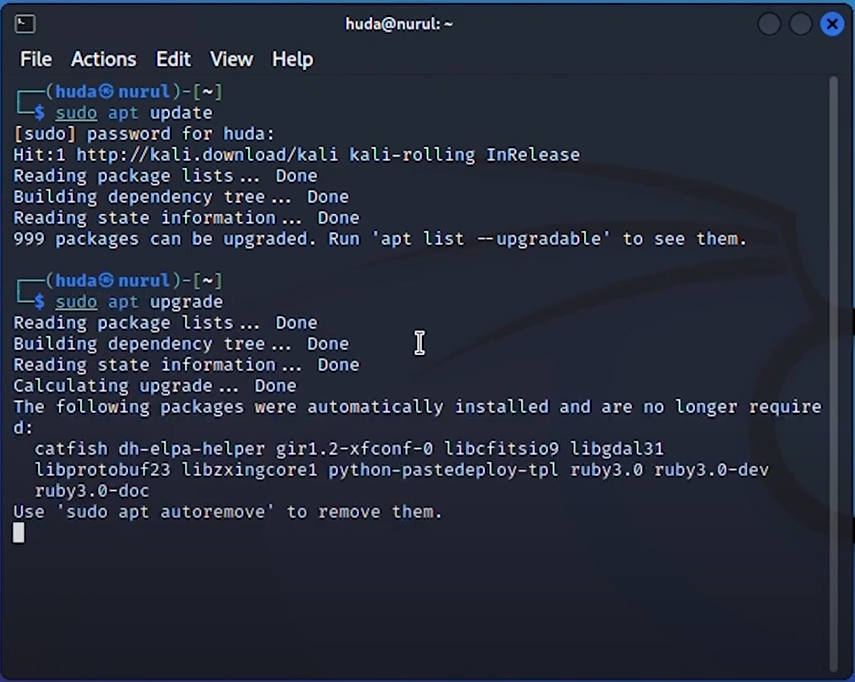
Finally, remove unnecessary packages by using “sudo apt autoremove” command.

Thank you for vising the instruction page.